GADGETS :: September 2, 2020
 by Gregg Ellman
(@greggellman)
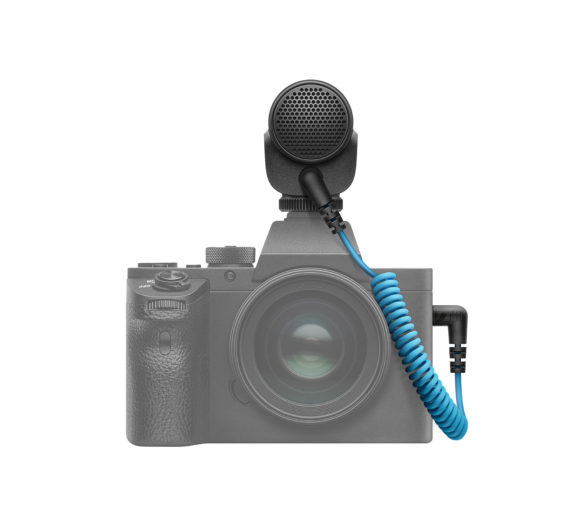
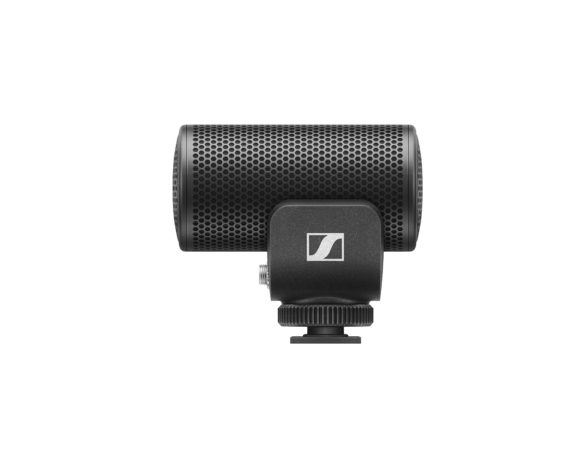
Anytime I get a new product from Sennheiser, I know before it’s even opened that there’s a near 100 percent chance it’s going to be great. So it was no surprise when I unboxed the brand new, hot off the press Sennheiser MKE 200 directional microphone, placed it on my digital camera, and it worked battery-free in a plug and play manner. The MKE 200 is the latest in Sennheiser’s MKE microphone series, all of which provide quality upgrades to a camera’s built-in microphone.
The compact microphone has built-in shock absorption and attaches to a camera with a cold shoe mount. With the mount, it slides on or off digital cameras’ flash shoes easily, enabling it to work handsfree so the videographer can concentrate on the camera controls. A 3.5 mm cable attaches the microphone to the camera’s audio in-port.
 With the compact size and mounting ability, Sennheiser designed the MKE 200 to work with most any standard digital SLR, mirrorless and mobile phones. With mobile devices, you’ll either have to hold the microphone with the audio cable plugged into the audio-in port or attach it to a bracket (not included) since mobile devices do no have the shoe bracket (typically used for flashes). Along with the cold shoe, there’s a photo industry standard 1/4-20 thread for attaching it to brackets and endless mounting accessories made for mobile devices and cameras.
I tested the mic on some basic street scenes, – kids playing, people taking morning walks, etc. In every situation with the microphone mounted on top of my DSLR, the directional design captured my wanted audio but not unwanted background noise.
My environment wasn’t windy but it’s good to know, according to a press release, that Sennheiser designed the MKE 200 with an integrated layer of protective mesh inside the housing. This protection is further enhanced by using the included furry windshield when filming outdoors.
With a friendly price point on the easy-to-use microphone, it’s easy to say it’s for an entry level use, which is not restricted to beginners.
https://en-us.sennheiser.com $99.95, available as of September 1
 I’m sure I could dig up statistics on what percentage of homes have a smartphone video doorbell such as the latest I tried, the EZVIZ DB1. But just looking around my neighborhood tells me this type of home security is a rapidly growing category.
A few reasons for the popularity are the cost, performance and especially the ease of use. With personal experience I can say the simple installation is what typically makes a product like this a make or break in my world and the EZVIZ DB1 is exactly that.
Several things must be in place before installation: Wi-Fi has to be present with a good signal and an existing wired doorbell.
The EZVIZ DB1 includes three hours of free cloud storage for the most recent motion-detected video clips, with more expanded pay plans available.
Built the built-in microSD memory card slot is a great feature for local storage, which many competitors do not have. Using your own memory cards in sizes up to 128GB is a great supplement to the free storage and any encrypted cloud storage plans you subscribe to.
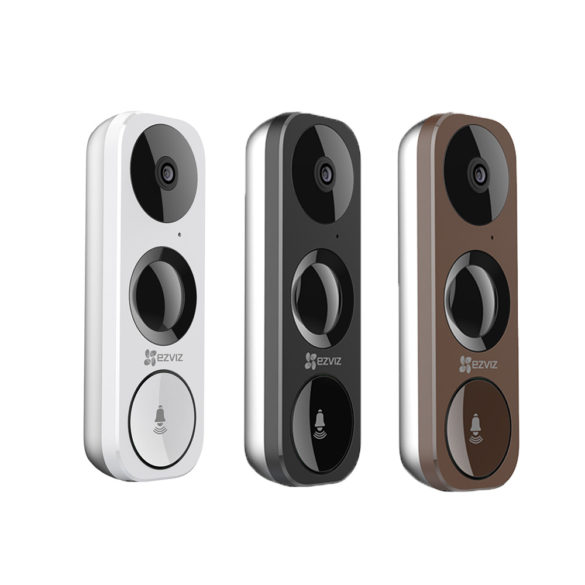
The 3 megapixel (resolution of 2048-by-1536 pixels) EZVIZ DB1 is built with a 2.2 mm f2.4 lens with a 180-degree vertical field of view and 105-degree horizontal view. It measures 5.11-by-1.8-by-0.8-inches and is built with IP65 weather protection for use in conditions minus 22 up to 140 degrees Fahrenheit and night vision up to 16-feet.
With the EZVIZ companion app and the built-in microphone and speaker, viewing and talking with subjects outside the front door can now be accessed 24/7 from a tablet or smartphone. Now, when your doorbell rings or the motion detector picks something up, the app alerts your device simultaneously. It’s that simple.
The app also allows for customization of the detection area you want covered so it doesn’t alert to to every passing car, for example.
Three mounting brackets are included, each with a slighting different angle when mounted to the wall. Hold up each to the wall before drilling holes to see what angle works best. Depending on your area, you may want the camera facing down to avoid a bright sky or raised up to include a bigger area, or whatever else you requires, one of the brackets should work.
Installation doesn’t requre an electrician, but please first turn off the electrical circuit to the doorbell system and disconnect the existing doorbell. Keep the wires in place because the instructions make it so easy, assuming the wires are there.
Also included with the EZVIZ DB1 is wire, screwdriver and a drill bit (sorry, drill not included) and a simple, well-explained installation guide. Different colored face plates help you match were its mounted.
www.ezvizlife.com $199.99